


Revolutionary Dust Management Systems
Dustless Technologies
Dustless makes universal and cost-effective dust collection systems. We design our products to keep workspaces and other areas free of dust and debris. Create a safe job site that protects the health of your employees with our array of Dustless tools that comply with hazardous dust control rules. Whether for commercial or personal use, we have the equipment and attachments you need.
Clean and Safe Dust-Free Work Areas
Dustless Technologies facilitates the best work practices because we have a full assortment of products that collects and manages unwanted dust that results from everyday work. When used with a proper vacuum, such as our line of Dustless Vacs, our shrouds are the simplest solution for complying with OSHA's silica rule and other regulations.
Dustless Products
View all products
Whether building, renovating, or creating, Dustless Technologies has the right equipment for you. We have engineered each item to seamlessly fit your existing tools and machinery. Our dustless shrouds and vacuum attachments cut down on cleanup and respiratory problems.

Where Can I Get Dustless Tools?
Please fill in your address/zip code to find the closest Dustless Tools dealers. You may also include only those dealers that stock an inventory of Dustless Tools' products by enabling the check box.
Due to challenges with shipping between various countries, international inquiries must be handled on an individual basis. If you are outside of the US and interested in buying or selling our product, please email international@dustlesstools.com with your inquiry.
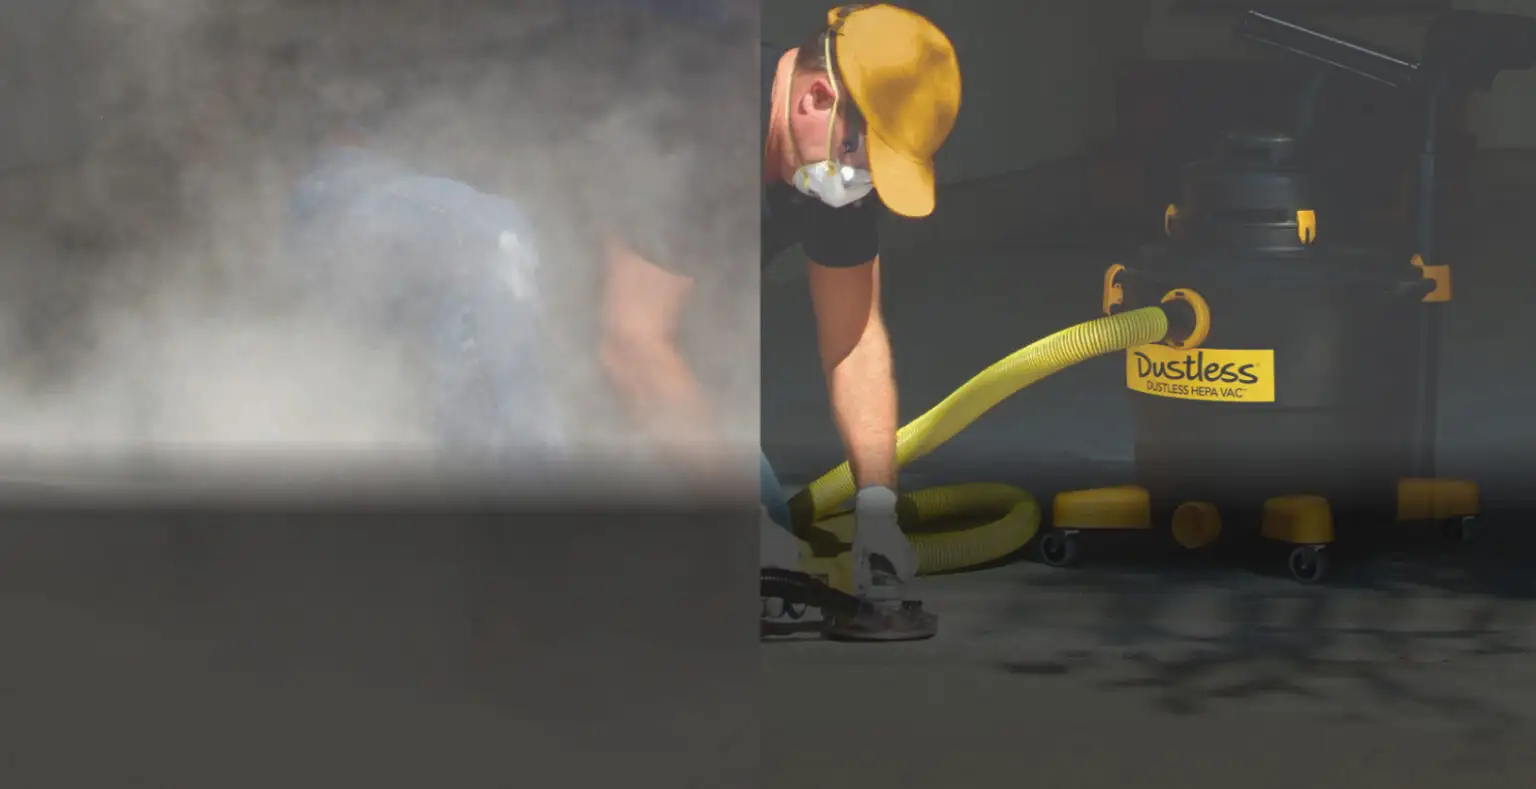
The Dust Collection Systems
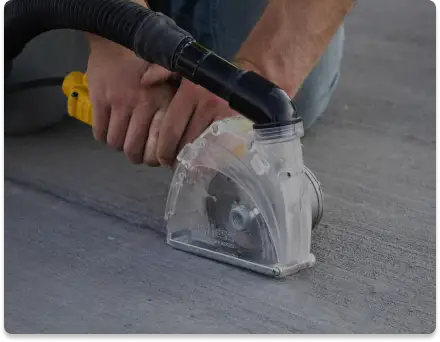
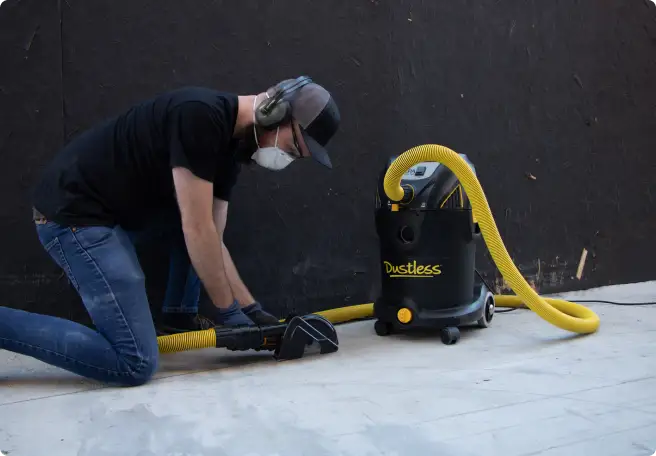
Our scraper vacuum attachment has a sharp blade so that it’s easier than ever to peel away layers of debris from floors, walls, and other surfaces. It’s compatible with our 18” hose and powerful Dustless HEPA Vac for a total mess-free system that makes working on projects a more precise and efficient task. In addition, you can conveniently add some replacement blades to your order for future use. Ours is the only tool you need to use when you’re scraping away materials because it gives you a good grip and is lightweight enough to hold for extended periods of time. Eliminate project cleanup by collecting scraps automatically at the source, which means no more sweeping or picking up debris by hand. Dustless Technologies makes the most universal and cost-effective dust collection systems on the market. No need to replace your existing tools!
Creates Dust
Hand grinders, saws, drills, and other construction tools create large volumes of dust. This dust is harmful to your lungs, timely to clean up, and in many cases, required by law to be contained. Your tool can't solve all these issues alone.
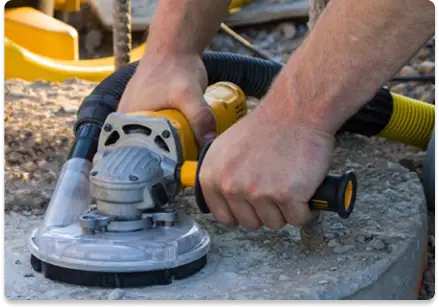
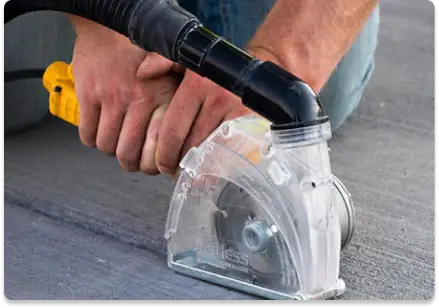
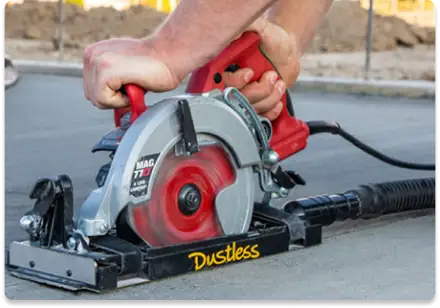
Diverts Dust
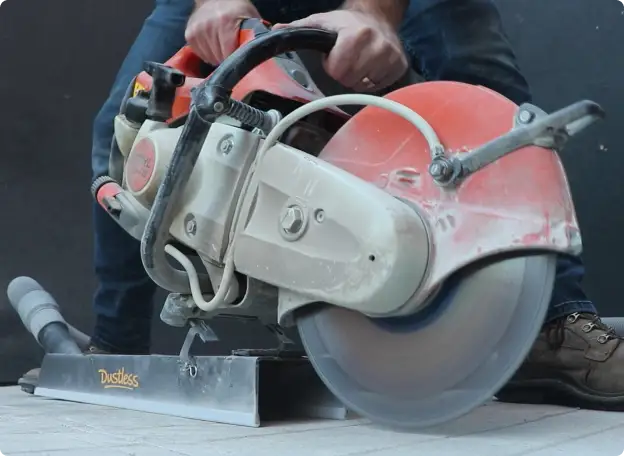
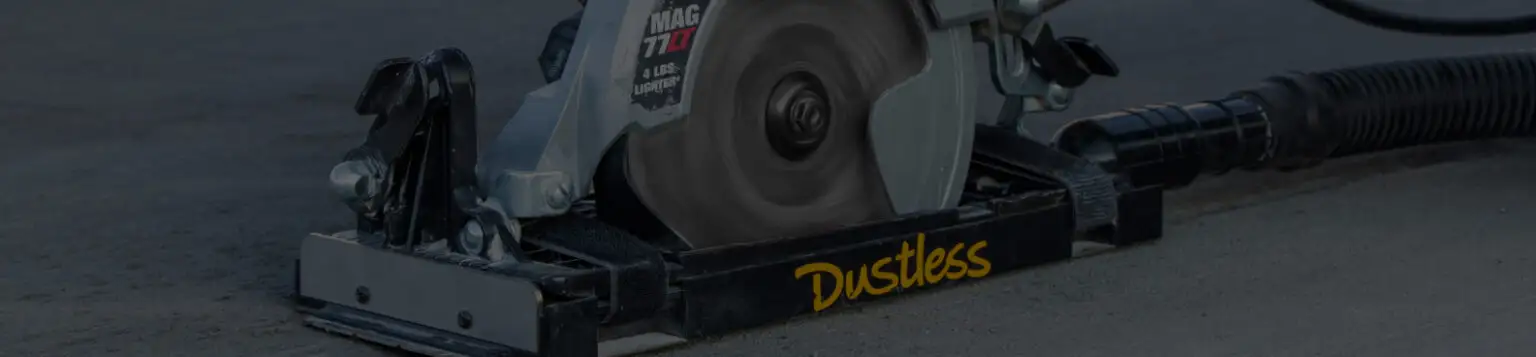
A shroud is a device that creates a controlled path for the dust to travel. Once it’s attached to your tool and vacuum, it helps to control dust generation. Each Dustless Systems shroud is designed with a universal mount that fits most major types of tools.
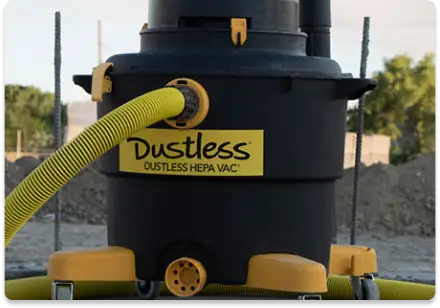
Collects Dust
Our Dustless Vacs were made with construction in mind. Every Dustless Vac is an essential part of a Dustless System. Every Dustless Vac provides superior levels of filtration and comes with a three-year warranty.
Our Most Popular Products


About Dustless Technologies
Dustless Technologies was born out of the need for one man to effectively empty out his coal and wood-burning fireplace. As an experienced diesel mechanic, Mike Loveless knew that he could solve the problem of preventing ash from getting everywhere when it came time to clean the fireplace. What started out in 1983 as a garage-based project has grown into an industry-leading producer of dustless shroud and dust management products.
We offer a full line of HEPA vacuums, point of contact dust shrouds, and accessories that comply with current guidelines and regulations set forth by the EPA, NIOSH, and OSHA to ensure a safe and healthy work environment.
EPA, RRP, OSHA, & NIOSH compliance
Create a safe jobsite that protects the health of you and your employees! Comply with hazardous dust control rules on construction sites. Dustless systems either meet the standard set forth in Table-1 of OSHA's new silica standard or meet compliance through objective data.
Subscribe to Our Newsletter
Stay in the know and subscribe to Dustless Technologies’s newsletter. You can read the latest news to keep up to date with our new products and OSHA requirements. We are a company that evolves with the changing times, so we invite you to read about our journey and innovations every quarter.
Shop Dustless Today
Shop our complete collection of dustless shrouds, dust collection, and dust management products today. Keeping your work areas clean, safe, and dust-free has always been our top priority. Now you can rest at ease with the best tools and equipment available.